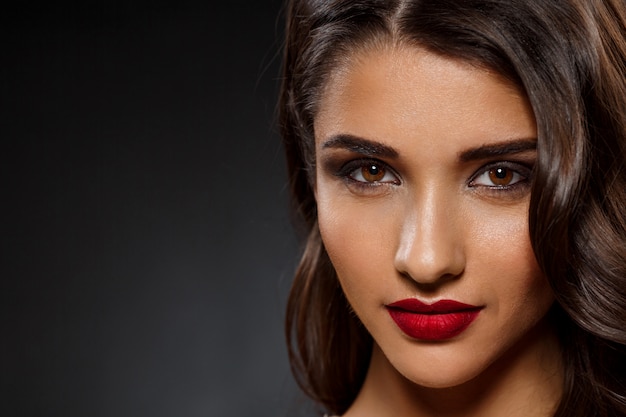
Bold brows have become a mainstay in the makeup world, and for good reason.
While light and natural brows have also found a place in the spotlight, the popularity of bold brows cannot be denied. This type of brow frames and adds structure to your face, instantly elevating your entire look.
However, achieving that perfectly sculpted, bold brow can feel like a lot of work, especially for makeup beginners. And this challenge often stems from understanding the concept of facial structure and brow shapes.

Understanding brow shapes and structures
Before diving into product application, it’s important to understand your natural brow shape and how to enhance it. You should also take note of your facial structure when carving or drawing brows.
Here’s a breakdown of the common brow shapes, and techniques to enhance them.
Low arch brows
For brows with a naturally low arch, the goal is to create a slight lift at the tail end. This opens up the eye area and gives a more youthful appearance. Note that when outlining your brow shape, you’re to focus on extending the tail slightly higher than the natural arch – this will make the brow slightly more defined and also enhance the look.
But remember, small strokes are key to creating a natural lift. Also, you shouldn’t raise the arch so much that it becomes too apparent.
High arch brows
High arches can usually add a dramatic flair to the face. And I must say you’re blessed if you have this shape naturally because all you need to do is fill in the sparse areas to get those bold brows.
However, if you find the arch a bit too dramatic, soften the angle slightly by extending the line of the arch towards the tail. This way, you can maintain the appearance without looking like you went overboard with the brows.
Straight brows
This is quite similar to low-arch brows, but they look more straight. Like the former, straight brows can be enhanced by adding a slight arch to create more definition and structure. When outlining your brows, start by sketching a soft arch towards the outer two-thirds of the brow. This arch should be subtle and complement the natural angle of your brow bone. So nothing excessive.
Once you understand this concept of brow structures, you’re ready to start creating amazing brows. So, let me walk you through a step-by-step process to create bold, defined eyebrows that flatter your face shape and complement your features.
How to draw bold, defined eyebrows
What you need
Now that you’ve identified your brow shape gather the tools you’ll need to create those bold beauties. Below is a list of items you’ll require and what you need to know about them.
Brow Pencil
Brow pencil comes in different shades. But I’ll advise you to choose a shade that closely matches your natural hair color or a shade lighter for a softer look. Also use a brow pencil with a firm tip – this will give you precise strokes and detailing.
Angeled Brush
The Angeled Brush is your best friend for creating hair-like strokes and defining the shape of your brows. When selecting an angle brush, look out for one with a firm, angled head and synthetic bristles.
Although your brush set will likely come with an angle brush, you can find one sold as a single piece. Some might argue that the latter is of better quality, but I think it all boils down to what works for you. Right?
Brow Powder
This is entirely optional. You can choose to stick with just your brow pencils. That’s okay.
However, while brow pencils offer great precision, brow powder can add a more natural, diffused look to your bold brows, especially if you choose a powder shade that matches your brow pencil or a slightly darker shade for added depth.
Brown gel
A tinted or clear brow gel is essential for setting your brows in place and keeping those hairs in check. You’d probably not be able to do a good job if those hairs point in all directions, so you need a gel to keep them in place while you work. This tinted gel can also add a touch of extra color and definition.

Spoolie Brush
Blending is the secret of every makeup look, and you have to master this act if you’re to create something amazing. For this brow, a fluffy brush is your secret weapon for blending out harsh lines and achieving a natural, textured finish.
While we want to achieve a bold finish, your brows should still look natural.
Concealer Foundation
You’ll need these to highlight your brows. For this step, a concealer or foundation should work the magic, depending on which is easier for you to handle and blend.
Step-by-step process of achieving bold brows
Step 1: Map out your brows
While this step is optional, it can give you a more precise and symmetrical look. Brow mapping can also help you visualize the shape of your brow and ensure they’re even.
All you need to do is lightly map out your desired brow shape using an eyebrow pencil or an eyeshadow shade (use a shade lighter than your brow hairs).
You can start by outlining the top and bottom of your desired brow shape, following your natural arch as a guide.
Step 2: Outline the brows
Using your angled brow brush and brow pencil, start sketching the outline of your desired brow shape. Start at the arch, the highest point of your brow, and work your way outwards towards the tail. Then, lightly fill in the front of the brow.
What you want to achieve here are small, hair-like strokes. So, focus on creating the illusion of individual brow hair rather than drawing a solid line.

Step 3: Fill and sculpt
Once you have the outline, use the brow pencil or powder to fill in sparse areas within the brow shape. If you’re using a powder, dip your angled brush lightly into the powder and tap off any excess. Then, using featherlight strokes, apply the powder toward your hair growth. If you decide to use a brow pencil, ensure it’s sharpened. This will help you be more precise with your strokes.
Step 4: Blend properly
This is where the spoolie brush comes in. Gently brush through your brows toward your hair growth to blend out any harsh lines and soften the overall look. The process will also help distribute the pencil color or brow powder evenly throughout your brows.
Step 5: Go in with the brow gel
Use your brow gel to set your brows in place and keep those hairs from straying. Apply the gel with short, upward strokes, following the direction of your hair growth.
If you used a brow powder in the previous step, you’ll probably notice a touch of extra color and definition with this tinted gel.
Step 6: Highlighting the brows
Once you’ve completed all the previous steps, it’s time to highlight your brows. Using either a foundation or concealer (I recommend both), gently highlight the brows with your angle brush and blend properly.
To give you more control in this step and ensure a flawless finish, I recommend highlighting the upper part of your brows and the beginning of the lower line with either your regular foundation or a concealer that matches your skin tone, then using a lighter shade for the rest of the lower line.
Blending the lighter concealer towards your crease and into your eyelid can create a base for your eyeshadow. And that’s it, guys! This is how to get those flawless, bold brows.
However, let me also mention that you must maintain your brows to achieve this look constantly. By this, I mean regular trimming, tweezing, and even shaping.
This will help make the work easier whenever you want to draw your brows.
Bye guys!


